The cost of high-quality laying of one square of tiles approaches the price of the finishing material itself. Therefore, many people are interested in how to lay tiles on the floor and walls on their own.
In the article I will give recommendations and tell you what construction skills will be needed so that the tiles lay down qualitatively and correctly, and the result of the work has a decent appearance.
Completing bathroom repair, the person sincerely rejoices, because now everything is new in the room. Over time, he begins to notice that the sink is covered with rust and limescale, the shower is leaking, and the tile has faded, cracked, or fallen off. As a result, thoughts about updating the repair appear.
Trying to reduce the cost of repairs in the bathroom, they want to learn the secrets and subtleties of laying tile. Anyone can master the skill of tiling. If in doubt, read the article in which you will find general information on laying tiles.
Useful Tips
Tile cladding provides a long-lasting and beautiful decorative coating. Upon completion of the finishing work, an ideal surface will be obtained.
- Stitches. In the case of wall tiles, the seams are horizontal and vertical. When it comes to sex, perpendiculars and parallels come to the fore. The width of the seams should be the same. Small plastic crosses of the same size help to achieve this effect.
- The verticality of the seams is usually checked by plumb. The size of the maximum deviation of the seam from the vertical axis shall not exceed 1 mm. If the deviation is large, the first row is to blame.
- The width and verticality of the seam is determined by the skill of laying and the quality of the tiles. Ideally, the size should match in height, width and diagonal. Despite the fact that at the enterprises the material is collected in calibrated bags, differences in size can not always be avoided.
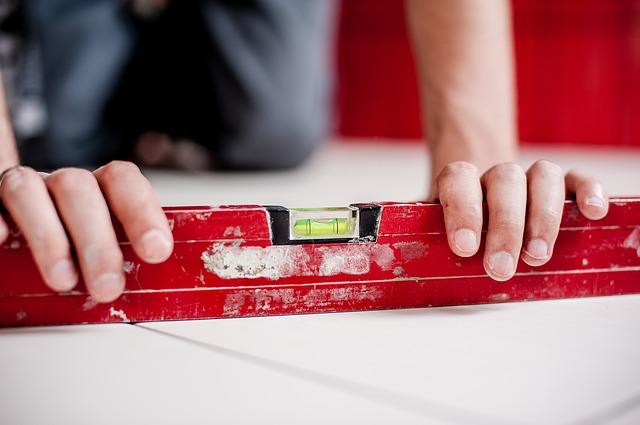
- The surface of the tiled surface should be as even as possible. This is checked easily - attach the building level to the plane and slip a bill into it.
- Novice tilers, laying tiles on a non-vertical wall, break the rows. Closer to the top, the layer of glue increases and may crack, and the tile will fall off. In this case, one can only dream of an ideal plane. Pre-aligning the wall will help to avoid this.
- In some cases, the material does not differ in an even plane. Therefore, at the very end of the facing work, “Amur waves” are formed. To check the quality of the plane of the tile, it is very simple to take two tiles from the same package and attach to each other. If there are gaps between the front sides, this indicates an unsatisfactory plane. It is customary to check the plane vertically and horizontally.
- The plane tiled should correspond to the level. As the theory goes, tiles are laid on the most even surface. That is why uneven floors and walls are pre-aligned with screed and plaster. Uneven walls cannot be aligned with a layer of glue. As a result, a thick layer of substance will be obtained, which will negatively affect strength.
- Tiles are laid in a plane so that the adhesive layer does not increase much.
When laying tile, be sure to observe the plane, horizon and level.
If the bathroom has uneven walls, pay attention to alignment.
How to lay tile on the floor
It is believed that hand-laying tiles on the floor is a laborious and complicated procedure. People who hold this opinion are very mistaken.
- First, prepare the floor. We remove dirt from the surface, wet it with clean water and level it with a solution. Prime the floor and allow it to dry.
- Tiles are laid on the floor in two ways. The first involves the use of cement mortar, the second - special glue.
- Take four tiles and arrange in the corners of the room. When laying other tiles, they serve as landmarks.
- Lay the tile parallel to the window line. The laying of the first row starts from the first, located in the corner. Be sure to level it.
- In the case of cement, it is recommended to print the tiles to the floor. If glue is used, apply to the tile and apply to the surface.
- Laying the second tile, press close to the first. Remove excess adhesive mixture and separate with plastic crosses. The result is a seam.
- Sometimes the whole tile does not fit. In this case, trim using a special tool.
- After completing the installation, wait a day. At the end of the period we proceed to the seams.
- If the tile is laid on cement, remove the excess solution, and after 48 hours pour cement milk. After two days, remove the cement, leaving only the seams.
- In the case of glue, after drying, grout the joints using a flexible spatula.
After installation, the surface must be washed. If the tile is laid on cement, it is allowed to use the room after a week. In the case of glue - after 48 hours.
Tiles for wall tiling
It is recommended to finish the walls in rooms with high humidity with ceramic tiles. It turns out an excellent waterproof coating, which will last for many years. The surface of the material is not susceptible to chemical attack, so a variety of cleaning products are used.
A step-by-step plan for laying tiles on the walls will help to avoid common mistakes and unnecessary costs.
- Calculate the number of tiles. Using a tape measure, measure the width and length of the walls, and calculate the area. Add one more square to the resulting value.
- Choose a tile carefully. The surface should be smooth, without flaws and kinks.
- Plan ahead on paper to find out where to cut.
- Prepare the walls before laying. According to the rules, they should be leveled and primed. The quality of installation depends entirely on the evenness of the walls. Drywalls or plasterboard will help to align the curved walls.
- After completing the work on leveling the surface of the walls, proceed with laying. It is recommended to use special glue and a device for cutting tiles.
- Attach a tile to the wall to lay out the first row as evenly as possible.
- Using a spatula with cloves, apply glue to the tile and spread over the surface. If the wall is even, the thickness of the adhesive layer is within 5 mm. If the curve, the layer thickness increases to eliminate the deviation.
- Attach the first tile to the rail and corner of the room. Glue the following horizontally. Using a level, check the vertical and horizontal.
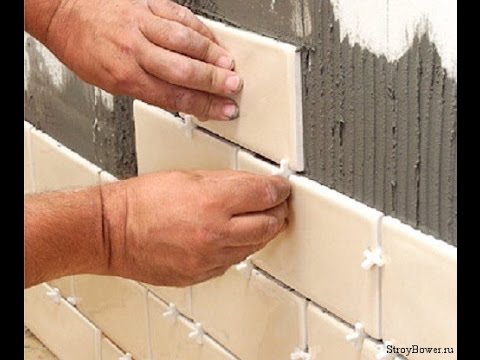
- Crosses are inserted between the tiles to get an even seam.
- Lay the tiles row by row. After 5 rows, pause to dry the glue. The adhesive mixture that comes out through the seams is removed.
- After finishing work, wait 24 hours. Then, without fear of overwriting the seams with a special compound. Grouting is recommended with a flexible spatula.
Instructional video
Having carefully read the information, start laying tiles. If the result of labor is far from ideal, do not be discouraged, because saving and precious experience is worth it.
Put tile on drywall
In rooms with high dampness and temperature differences, drywall is used to level the walls. This building material is by leveling the wall; structures are constructed from it that cover the wiring, sewage and water pipes.
Special rules have been developed for preparing the surface and laying tiles on a wall made of drywall.
- Make a crate under the drywall. The base is mounted using a bar or metal rails. Pre-coat the tree with special moisture-resistant impregnation.
- Screw drywall onto the crate. The distance from one self-tapping screw to another does not exceed 20 cm. As a result, drywall will not warp under the weight of the tile and the masonry will remain intact.
- Engage the primer. If priming the walls with a roller, use a special mold to squeeze out excess fluid.
- Apply the primer to drywall in two layers. At the end of the procedure, wait a while for the surface to dry.
- Putty joints and heads of self-tapping screws. Use gypsum plaster and a narrow spatula.
- Wait for the plaster to dry and remove any irregularities with the skin. Prime the polished places.
- Lay out the tiles on a piece of paper to calculate how much finishing material is needed. Buy tiles in the store with a margin.
- Prepare the glue. As part of a simple procedure, it is important to adhere to the proportion indicated on the bag. Stir the mixture with a drill and mixer.
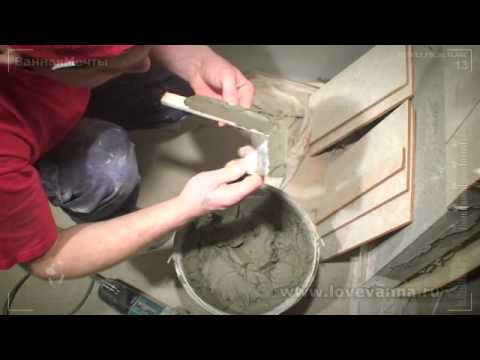
- The finished mixture is applied to the wall in an even layer by means of a spatula. Then, a special scraper is carried out in the place, as a result, grooves are obtained. In this case, the material will grasp well with drywall.
- Start laying from the bottom row. Verify the vertical and horizontal levels. Tilers recommend using plastic crosses to achieve even seams.
- After laying 5 rows, take a break. While relaxing, the tile will stick to the base.
- After laying the tile, wait a day. After that, apply a special grout to the seams with a small flexible spatula. Remove excess grout immediately with a sponge.
If it seemed that laying tiles on drywall is a difficult event, believe me, this is not so. Have confidence and patience and get to work. After a few hours of practice, your actions will become more confident. The main thing is not to rush.
Tiling in the bathroom
Many companies offer the “turnkey bathroom” service. The service is noteworthy, but also not cheap. It is more profitable to learn how to lay tiles yourself at home.
Before starting the main work, work with a pencil and a ruler. Based on the measurements, create a surface plan and determine the location of the tile. Be sure to note the location of friezes, borders and other decorative elements.
Strive to avoid narrow stripes of tiles in the corners of the room, because it looks ugly. Also decide on the styling option and size. After completing the calculations and calculations, get to work.
- Prepare the walls by carefully leveling. A flat surface is largely dependent on the initial condition.
- If the wall that you intend to tile is painted earlier, completely remove the paint. The glue does not adhere well to painted surfaces. It is recommended to shoot down paint with a puncher with a special nozzle. Using the tool provides high speed. True, it is accompanied by noise. If there is no hammer drill, use a grinder with a special nozzle.
- If the mechanization of the work fails, an hatchet or putty knife will come to the rescue if the layer of paint is weak.
- Remove debris from the wall and prime twice for greater reliability.
- Before starting tile work, solve the issue of communications. It concerns sewerage, wiring and plumbing. Make the task easier hammer drill. Indoor temperature should be above 8 degrees.
- Start cooking glue.Pour the dry mixture in small portions into a bucket of water and stir with a mixer. See the proportions on the packaging.
- So that the glue sticks well, soak the tile in water for 10 minutes.
- To obtain the most even masonry, it is recommended to use a level. Place plastic crosses between the tiles. They will help to make the seams extremely even.
- To lay the tiles different evenness and quality, correctly lay out the first row. This will help the water level and the metal profile, attached to the marks.
- After leveling and priming the surface, start laying. Apply the adhesive mixture to the wall and distribute using a spatula with teeth. Then attach the tile to the wall.
- Tile on the wall is laid from bottom to top. Having laid the first row on the installed profile, proceed to the second row and so on to the ceiling. Check the plane of the surface with the level, as well as the verticality of the installed tile.
- Tiles on the floor are laid according to a similar principle. It is recommended to start from the far corner and move slowly towards the door. To increase the convenience of masonry, use a construction thread.
- After laying, leave work for 2 days. Then proceed to mashing the seams.
If you are repairing a bathroom without help, don’t be afraid, be patient and move forward. Remember, all the great masters in the past started the same way. With a little practice, fill your hand and increase your skill level.
How to tile in the kitchen
Everyone has to repair the kitchen. The best material for lining kitchen surfaces is ceramic tile. Its service life is estimated in decades, and after cooking pork and beef is much easier to wash the kitchen.
True, almost always a person is at a crossroads. One way involves the involvement of the master, and the second - independent work. Since the second option is cheaper, most prefer it.
Training
- Prepare the room. Remove obsolete coating from all walls and peel wallpaper. To remove a layer of oil paint from the wall is almost impossible. In this case, make notches along its surface and prime several times.
- Solve the wiring issue. Sockets should be installed at a height of 90 cm.
- Determine the level in the horizontal plane. It will help determine the location of the tile on the wall.
- Having received the marking, fix a flat bar or metal profile.
Without tools to solve the problem will not work. To lay the tiles you will need a drill, mixer nozzle, two spatulas, crosses, a milling cutter and a flexible spatula, sponge. The list of materials is presented by tile, glue and grout.
Stacking
On the back of the tile from the factory, an arrow or a special icon is applied. Lay so that the arrows or icons look in the same direction. As a result, the discrepancy will be negligible.
- Glue the tile on the wall, installing it on a previously battered rail. By level, set vertically.
- Glue the top tile, which is similarly aligned on a plane. To control the seams, it is customary to use crosses, the size of which depends on the desired width.
- The remaining material is laid in a similar manner to the corner of the room. Immediately put the bottom row, then the top, between them crosses.
- In the corners, the tile is trimmed with a grinder with a special circle or tile cutter.
The holes for the switches and sockets are cut using a drill and cutter. It’s not worth rushing to solve the problem.
After finishing laying the tiles, wait a day. Then boldly grout the seams. Now it remains to lay the tile on the floor.
Tile laying methods
Concluding the topic of the article, we will consider popular ways of laying tiles at home. Some of them will help to visually raise the ceiling, others - to expand the room or hide defects.
- Direct masonry. A great and simple solution for rectangular rooms. Provides for the use of narrow tiles and vertical styling.
- Diagonal styling. It will help revitalize the room. Ideal in square rooms.The main advantage is the ability to mask oblique walls.
- Chess. Often found in old kitchens and bathrooms. In a small square room, checkerboard styling helps to achieve a wonderful effect.
- Offset styling. Represents the perfect harmony of alternations and lines. Most often used in rectangular rooms. Having chosen a large tile, by means of offset laying, visually enlarge the room.
- Mosaic. The surface, decorated in mosaic style, looks gorgeous. It makes no sense to spread the entire floor with mosaics. It is enough to complete the frame, emphasizing and highlighting a different type of styling.
Want to make the room unique? Then select one of the listed styling options. The effect will be breathtaking. With the right styling, even in the summer kitchen new year interior.
We did not consider the topic of choosing the color of the tiles, since personal preferences come to the fore here. The main thing is to select competently and tastefully. Good luck in repair and see you soon!