Ceiling decoration is an important stage of repair in the room, and the result depends on the material. Today, gypsum plasterboard is popular in the decoration of rooms, which helps to realize design ideas of various degrees of complexity. Let's look at how to make a drywall ceiling with your own hands and get acquainted with step-by-step instructions.
From the title of the article, it is clear that gypsum is the basis - the oldest building material that hardens upon contact with water. As a result, the hardening composition is shaped.
The properties of drywall help designers bring to life ideas that previously could not be realized through traditional materials, including rebar, brick and cement. It helps create structures and level surfaces. Allowed on itto tile.
The advantages and disadvantages of drywall
Drywall is a sheet-type finishing material consisting of a gypsum core, a cardboard cover and fillers. To make the material dense, fiberglass and reinforcing agents are added to the composition.
- Drywall - environmentally friendly material. It is safe for the environment, excellent sound insulation properties, due to which it is suitable for the construction of interior partitions.
- Sheets are endowed with energy-saving properties and “breathe”. The material is simply created for rooms with dry air, as it improves the microclimate.
- Excellent plasticity deserves attention.. It is easy to make a cozy niche, a suspended ceiling, an intricate partition wall and any element of the design of the plasterboard.
- Light weight. Drywall is suitable for use in cases where ordinary brickwork is unacceptable.
- Gypsum plasterboard - a tool for leveling surfaces. Previously, tons of plaster and a lot of time were used to level the surfaces. Today, several sheets of drywall will help to achieve the result.
- Drywall is easy to install. Even a layman will cope with the task. The average man can build a structure of material that will change the interior.
The list of advantages of the material is decent. But there are no ideal things and drywall is not without flaws.
- The first disadvantage of drywall is fragility. It is recommended to transport carefully and store in a horizontal position. If plasterboard sheets are stored upright, they will bend.
- It absorbs moisture, which causes inconvenience. After delivery, the drywall is left to lie down to get rid of excess moisture and become suitable for use.
- Installation of drywall structures reduces the volume of the room. Sheets are mounted on a frame made of metal profiles.
There are many professional builders who will name a number of shortcomings. I believe that the “dry construction” technique deserves attention, and the flaws do not affect the popularity.
How to make a two-level plasterboard ceiling
If the height of the room exceeds 2.5 meters, feel free to make a multi-level ceiling from plasterboard sheets.
I offer the simplest step-by-step instructions to get acquainted with the construction technique of a multi-level ceiling structure.Having received additional information and experience, you can create complex masterpieces.
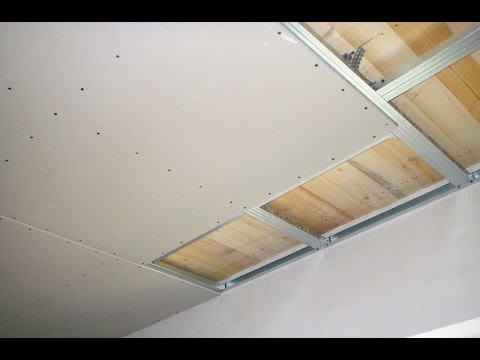
Step number 1 - marking and construction of the frame
- First, mark up. From the bottom of the ceiling, step back three centimeters and put a mark. Using a water level, place marks in the corners of the room.
- Using a dye thread, beat the frame line. An important stage, since the result depends on it. Enough to make a mistake, and the finished design will be far from ideal.
- Determine the direction of drywall sheets. Having solved the problem, draw strips across the ceiling half a meter on the ceiling. This will help the thread with the dye. Then proceed to the construction of the frame.
- For the frame, metal profiles CD and UD are provided.. On the perimeter of the room, fix the UD profile, guided by the reference line. If the profile is without mounting holes, drill a wall through the profile. The distance between the mounts is fifty centimeters. If the floors are made of concrete, use a hammer or hammer to drill holesdrill.
- Fix the profile to the wall with hollow dowels with a diameter of six millimeters and screws. To attach the frame elements to the main ceiling, use flared dowels. Conventional dowels are not suitable, they will fall into voids, which are many in concrete ceiling ceilings.
- Attach suspensions along broken lines on the ceiling surface, considering the listed requirements for fixing systems. Suspensions should be sixty centimeters apart. If you want a reliable design, do not neglect the numbers.
- Install CD profiles under suspensionsby inserting the ends into the UD profile. Pull the thread under the frame to level it. As the CD profiles sag, tighten with the middle suspensions, folding the ears.
- It remains to connect the structural elements using special small screws. The result is an even horizontal plane. Then proceed with the installation of drywall.
Step No. 2 - Installation of drywall
- I advise you to fasten the drywall sheets to the frame together, otherwise spoil the material. For this purpose, screws for metal are provided. The distance between the screws is thirty centimeters. Twist the screws so that the head does not protrude, but also does not break through the cardboard.
- The next step involves the construction of the second level. On the finished drywall construction, draw the contours of the second level.
- Then bend the UW 75 profile. On its walls make incisions at the same distance. Screw the profile with screws to the first level of the ceiling, using the drawn line as a guide.
- Screw the UD profile to the wall, insert CD profiles between it and the UW profile, and use the screws to connect the elements. If the length of the profile on which the drywall is fixed exceeds 50 cm, strengthen it with an additional suspension. Now attach drywall, and cut off the excess with a hacksaw.
- It will remain to establish a vertical strip. From a sheet of drywall, cut a piece that is suitable in size, and make cuts from the back after a short distance. Fix the element with self-tapping screws.
Video instruction
Using tips and step-by-step instructions, make a chic two-level drywall ceiling decorated with figures at home. In a similar way, the ceiling can be equipped with a third level. It all depends on preferences and wishes.
DIY plasterboard ceiling
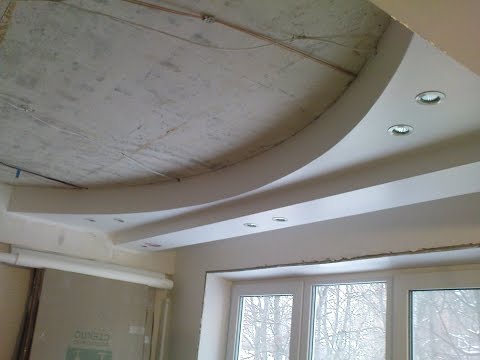
Drywall helps bring design ideas to life. People who choose classics can create a traditional “flat” ceiling from drywall, and connoisseurs of originality can create a multi-level ceiling design, complemented by transitions, bends and lighting.
The manufacturing technology of complex structures with backlighting provides for building an additional level on top of the base ceiling system.
Consider the advantages of this design.
- The design is simple. Self-tapping screws are screwed into the ceiling from drywall, and there is no need to drill holes in concrete slabs.
- Work with bends is performed on the sides of the box. This eliminates the possibility of inconsistencies with the borders.
- The technique allows you to create steps, sleeves and islands. The person involved in the arrangement of the ceiling has ample opportunities for creativity.
Installation consists of several stages, each of which is important. This is the preparation of the foundation, the manufacture of the frame, the manufacture of a niche for lighting equipment, electrical and decorative work.
Before installation, remove small furniture from the room. If it is impossible to move to another place, cover with a film or a thick cloth.
Free space will facilitate unhindered installation. It’s dusty while working indoors. If you do not plan to change the wallpaper, also cover them with film.
Step-by-Step Action Plan
- Correctly calculate the height of the second level. During calculations, be sure to consider the size of communications and lighting equipment. After the perimeter, install the guide profile.
- To get a curved box, prepare a flexible profile. Carefully cut the shelves of the guide profile. As a result, the back will become flexible. To make the radius smooth, make incisions as close to each other as possible.
- Draw curved markings on the ceiling. Oval is a favorite figure of designers. However, you can give the shape you want.
- At the end of the marking, attach the curved profile to the ceiling. Fasten through a sheet of drywall. This is not easy, since the CD profile is covered with finishing material. But there is a trick - a magnet will help to find.
- Prepare a strip of drywallcorresponding to the size of the step. Soak the sheet evenly with water and gently roll with a spike roller. After acquiring ductility, attach to the side of the profile.
- To connect the end ends of the side, use self-tapping screws. Wait for the finishing material to dry. It will take twelve hours. While the drywall is drying, prepare another flexible profile.
- The next day, secure the second profile to the bottom of the side. The result is two profiles, between which insert CD profiles. They will serve as the basis for covering an additional level.
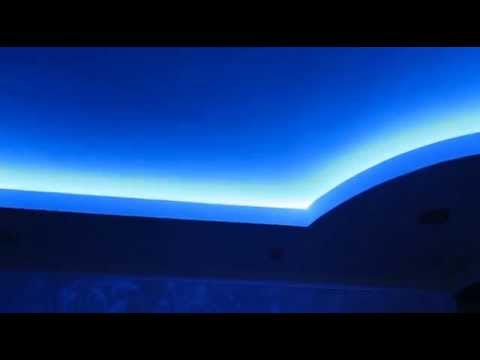
Installation of the first level was not considered, since this technique is no different from the one described at the beginning of the article. The ceiling is ready. Now it's time to think about lighting.
Video material
Wiring device
The wiring and lighting equipment is the main stage of installation work. Consider the location of the fixtures and the type in the process of sketching the ceiling. It is worthwhile to find out where certain lighting elements are sold.
The chandelier is usually hung in the center of the room. Open spaces and the perimeter of the ceiling are allocated to spotlights and hidden lighting. Often, designers refuse to use the chandelier, because it is not easy to fit into the picture of the interior.
Observe the following rules during wiring and remember that an error will lead to consequences that pose a potential threat to health and life.
- Twisting wires at inaccessible points is prohibited.
- Do not connect copper wires with aluminum.
- The switch must open the phase.
- Corrugation is used to protect wires under the ceiling. Cables should be located as far as possible from the screws.
- If you plan to create a complex lighting system, draw an independent line from the shield and put the machine in.
At first glance, the instructions seem complicated. Dont be upset. If you are serious about business, an attempt to create a beautiful ceiling will succeed.
Creating a plasterboard ceiling in a wooden house
People who bought or built a wooden house, believe that there will be no difficulties with the arrangement. In reality, the opposite is true when it comes to the ceiling. Lathing and installation of drywall - simple work, but working with wood has features.
Wood is a moving material that can be displaced, covered with cracks and crevices. Wood is exposed to temperature changes and high humidity. Under such conditions, it swells or shrinks, which affects the ceiling - cracks appear between the sheets of drywall.
To avoid problems, I advise you to get acquainted with the secrets of installing a ceiling in a wooden house and study the features of fixing sheets. With the help of recommendations, arrange a flat ceiling in the house that will delight your appearance.
- First of all, study the ceiling and find the bottom point. Having gone down a few centimeters, draw a line along the perimeter of the room through the level. Thanks to the markup, you will make an even frame. Before arranging the crate, pay attention to waterproofing.
- Frame made of wood or metal profiles. You will have to build a structure independent of the walls to avoid deformation of the ceiling during shrinkage or drying out of the house.
- Fix the wooden blocks perpendicular to the beams after forty centimeters. This is enough to secure the drywall.
- In the case of a metal profile, the perpendicularity of the fastening is maintained, but the distance between the elements can be increased by twenty centimeters. Then, insert the guide profile into the ends. It is not attached to the wall, the ceiling is independent of the walls.
- Wires protruding from the ceiling do not paint the structure. Make the wiring prior to the installation of drywall sheets.
- Consider prematurely how to light the ceiling. As a result, determine the mounting location of the chandelier and the installation point of the fixtures. Lead wires protected by a corrugated pipe to each place in advance.
- Lay the sheets of drywall in a checkerboard pattern. The edge of the canvas should be at the center of the profile. This will help to securely fix the sheets using self-tapping screws and a screwdriver.
- I recommend screwing the screws through fifteen centimeters. Such a step will create a strong ceiling. When fastening the sheets, make sure that the head of the self-tapping screw goes deeper into the sheet by about a millimeter.
There is a misconception that drywall needs to be strengthened. This is a waste of money. A good frame and reliable fastening of the sheets abound.
Video tips
When the repair is completed, sit comfortably in a soft chair, drink tequila and admire the new ceiling. Guests who look at the light will be envious.
In conclusion, I will pay a little attention to the final surface finish. It is a putty and fine finish of the ceiling structure. If the joints between the drywall are small, apply a reinforcing tape and putty. To make the ceiling durable, I recommend a little work.
Using a carpentry knife, embroider the seams. The width is half a centimeter, and the slant angles of the plates are 45 degrees. Apply elastic putty and reinforcing blade. Put an extra layer on top of the tape. When the putty dries, it remains to clean the seams and paint the ceiling.
I will add that there are no impossible things in repairing at home. You will quickly learn the technique of creating ceilings. Examine the information and put the knowledge into practice. Strive for the best and everything will work out.